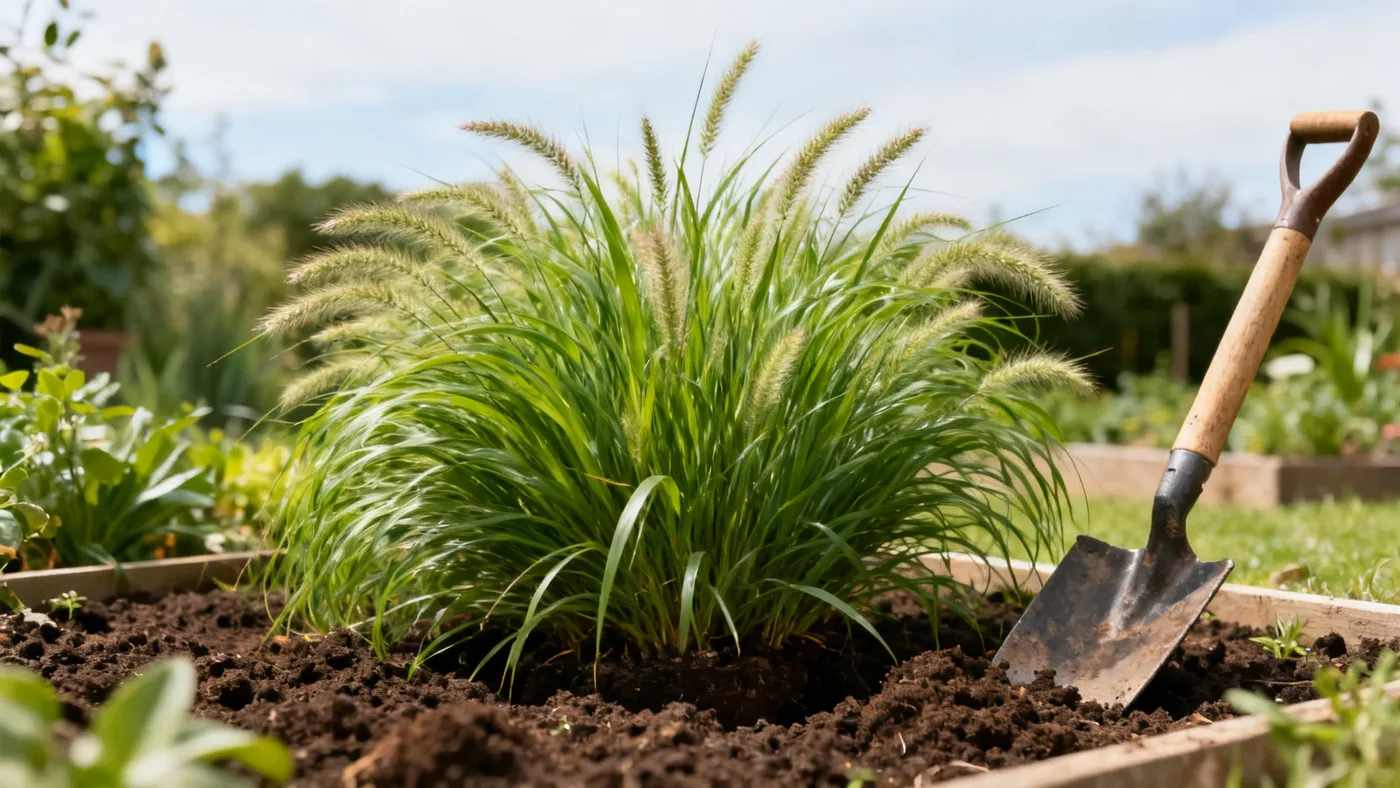
How to Plant Dwarf Fountain Grass for a Thriving Clump
Getting Dwarf Fountain Grass (Pennisetum alopecuroides 'Hameln') in the ground is straightforward, but doing it right from the start means you'll get a fuller, more vibrant plant faster. Whether you're filling a border, massing plants for impact, or adding an accent to a perennial bed, the planting process sets the tone for years of low-fuss ornamental beauty. This guide walks you through how to plant Dwarf Fountain Grass so it establishes quickly and reaches its mature fountain shape without struggle.
What You'll Need to Plant Dwarf Fountain Grass
Before you dig, gather these materials to make the planting process efficient and set your grass up for success:
- A Dwarf Fountain Grass plant (typically sold in a quart or #1 container from nurseries)
- Well-drained potting soil or garden soil amendment (compost or aged bark)
- A spade or garden shovel
- A hand trowel
- Balanced slow-release fertilizer (optional at planting, commonly applied the following spring)
- Mulch (wood chips or compost, 1 to 2 inches deep)
- A watering can or hose with a gentle spray nozzle
- Measuring tape (to confirm spacing in group plantings)
- Gloves (soil-handling preference)
When to Plant Dwarf Fountain Grass
Timing matters more than many gardeners realize. The best window for planting Dwarf Fountain Grass is spring, after your area's last frost date. This gives the plant a full growing season to settle in and build root reserves before winter dormancy. Depending on your USDA hardiness zone (the plant grows in zones 5 through 9), "after last frost" might mean late March in zone 9 or early June in zone 5. Check your local cooperative extension service for your exact frost date.
Fall planting is possible in milder zones (8 and 9), but only if planted early enough in autumn to allow 8 to 10 weeks of root establishment before hard freezes arrive. If you're in zones 5, 6, or 7, spring planting is your safest bet.
Step-by-Step Planting Instructions
Step 1: Choose Your Location
Dwarf Fountain Grass thrives in full sun. Select a spot that receives at least six hours of direct sunlight daily; eight or more hours is ideal. The plant tolerates light or part shade but will produce fewer blooms and develop a floppier, less upright habit in reduced light. Avoid planting directly against a south-facing wall or in intense afternoon heat reflection if you live in zones 8 or 9, as the soil can become excessively warm.
Step 2: Prepare the Soil
Dwarf Fountain Grass is adaptable but demands well-drained soil. The plant dislikes sitting in constantly wet ground and is prone to crown rot if drainage is poor. If your soil is heavy clay, amend the planting hole with compost or aged bark to a depth of 8 to 10 inches. Mix the native soil with the amendment roughly 50/50. For sandy soils, integrate 2 to 3 inches of compost to improve water retention slightly.
Soil pH is flexible (the plant grows in soils ranging from 6.0 to 7.5), so a standard soil test is optional unless you have known pH extremes. Average garden soil is usually sufficient.
Step 3: Dig the Planting Hole
Dig a hole slightly wider and no deeper than the root ball of your nursery plant. If your plant is in a quart pot, the hole should be roughly 10 to 12 inches wide and about 8 inches deep. The top of the root ball should sit level with or slightly above the surrounding grade; planting too deep encourages crown rot. Use your hand trowel to roughen the sides of the hole, which helps roots penetrate into surrounding soil.
Step 4: Remove and Position the Plant
Gently remove your Dwarf Fountain Grass from its container. If the roots are tightly wound, use your fingers or a hand tool to gently tease them apart, especially around the base and sides of the root ball. This encourages roots to spread into the native soil rather than circling in a confined pattern.
Set the plant in the hole, checking that the top of the root ball is level with the ground. Adjust soil beneath the plant if needed so it sits at the correct depth. A plant that sits too low will suffer crown rot; one too high will struggle to access soil moisture.
Step 5: Backfill and Firm the Soil
Fill the hole with the amended soil mixture, pressing gently but firmly as you go to eliminate large air pockets. Fill to ground level, then create a slight basin around the base of the plant (about 1 to 2 inches of depression) to catch and hold water during irrigation. Do not mound soil around the crown, as this traps moisture and invites rot.
Step 6: Water Thoroughly
Water the newly planted grass deeply and slowly until water saturates the soil around the root ball. In spring, aim for about 1 inch of water at planting time. This settles the soil and eliminates air pockets while giving the plant immediate hydration. Allow excess water to drain; do not leave standing water.
Step 7: Apply Mulch
Once the soil has drained, apply 1 to 2 inches of mulch (wood chips or compost) around the base, keeping it at least 2 inches away from the crown of the plant to prevent moisture accumulation. Mulch moderates soil temperature, retains moisture, and suppresses weeds during the critical first season.
Step 8: Fertilize (Optional at Planting)
Dwarf Fountain Grass is a light feeder and does not require fertilizer at planting time. However, if you choose to apply a balanced slow-release fertilizer, do so sparingly. Over-fertilizing causes the plant to grow lush and flop open instead of maintaining its tight, fountain-like form. If you do fertilize, wait until the following spring, when new growth is emerging, and apply only a single application per year.
Spacing for Dwarf Fountain Grass
If you're planting Dwarf Fountain Grass in a border or mass planting, space plants 18 to 24 inches apart center-to-center. At 18 inches, plants will touch and create a denser effect by their second full season. At 24 inches, you'll see more individual clumps and more open space between plants. Mature plants reach 18 to 24 inches in width and 18 to 24 inches in height (24 to 30 inches when flower plumes fully emerge), so 24-inch spacing accommodates mature size without overcrowding.
Watering Your New Plant
The first growing season is critical. Even though Dwarf Fountain Grass is drought tolerant once established, newly planted divisions appreciate regular water. Water deeply once or twice per week (depending on rainfall and temperature) until the plant enters dormancy in late fall. Aim for consistent moisture in the top 2 to 3 inches of soil, but avoid waterlogging. Once the plant is established (by the end of its first season or into its second year), you can reduce watering to rely on natural rainfall in most regions, though summer drought may warrant an occasional deep watering.
Tips and Common Mistakes to Avoid
Tip: Plant in Spring for Best Results
Spring planting gives the grass the longest window to establish roots before winter dormancy. This extra time pays dividends in plant size and vigor by the end of its second year.
Tip: Don't Amend Heavily if Your Soil is Already Good
If you have average to good garden soil with adequate drainage, resist the urge to overly amend the planting hole. Over-amending creates a plush pocket of rich soil that can encourage the plant to stay shallow-rooted rather than exploring native soil below.
Common Mistake: Planting Too Deep
The top of the root ball should sit at or just above grade. Planting deeper than this is the leading cause of crown rot in fountain grasses and is difficult to correct after the fact.
Common Mistake: Overwatering or Poor Drainage
Dwarf Fountain Grass cannot tolerate constantly wet soil. If your site has standing water after rain or irrigation, amend the soil or choose a different location. Raised beds can be an alternative for naturally wet spots.
Common Mistake: Planting in Too Much Shade
Plants in part shade will bloom sparsely and flop outward rather than maintain an upright, fountain shape. Give your grass at least six hours of direct sun daily; eight is better.
Common Mistake: Over-Fertilizing
A single balanced application in spring of the following year is enough. Additional fertilizer pushes soft, floppy growth instead of the sturdy form you want.
What to Expect After Planting
Your newly planted Dwarf Fountain Grass will produce some growth in its first season, particularly if planted in spring. Most divisions bloom in their first year from a nursery division, so expect delicate creamy tan to buff-colored bottlebrush-like plumes emerging in mid to late summer (roughly July through September, depending on your region).
Full mature clump size is reached in 2 to 3 seasons, with the plant gaining roughly 6 to 12 inches of spread and height per year while establishing. By the end of its second or third year, you'll have a substantial, well-formed mound. In fall, foliage and plumes turn golden tan to bronze, providing excellent seasonal color and winter interest if left uncut through the dormant season.
Planting in Containers
If garden space is limited or you prefer movable plantings, Dwarf Fountain Grass performs well in containers. Use a well-draining potting mix (not garden soil) and a container at least 12 inches in diameter. Follow the same planting depth rule: the top of the root ball should sit at the rim of the container. Water container-grown plants more frequently than in-ground plants, as pots drain quickly. In zones 5 through 7, move containers to an unheated garage or shed for winter, or provide heavy mulch around the pot. Zones 8 and 9 can leave containers outdoors if drainage holes are present and winter temperatures don't drop below 5 degrees Fahrenheit.
Aftercare and Long-Term Success
For detailed care beyond planting, including pruning schedules and seasonal maintenance, see our Dwarf Fountain Grass care guide. In summary, prune the entire clump back to 2 to 4 inches in late winter or very early spring before new growth emerges. Divide established clumps every 3 to 4 years in early spring if the center begins to thin or die out. Pest problems are rare; the plant is generally pest and deer resistant.
Planting Checklist and Quick Reference
| Task | Details |
|---|---|
| Timing | Spring after last frost (zones 5-7) or fall in milder zones if 8-10 weeks remain before hard frost |
| Sun Requirement | Full sun (6+ hours direct light); part shade tolerated but results in fewer blooms and floppier habit |
| Soil Type | Well-drained, average soil; adaptable to clay or sandy if amended; pH 6.0-7.5 |
| Hole Size | Slightly wider than root ball; planting depth must not exceed top of root ball |
| Spacing | 18-24 inches apart center-to-center for borders and mass plantings |
| Initial Water | Deep watering at planting; consistent moisture first season; average moisture thereafter |
| Mulch | 1-2 inches around base, kept 2 inches away from crown |
| Fertilizer | Optional; if applied, use balanced slow-release in spring only (single application per year) |
| Expected Bloom | First year from nursery division; full size in 2-3 seasons (6-12 in growth per year while establishing) |
| Container Growing | Use well-draining potting mix in 12 in+ diameter pot; winter protection needed in zones 5-7 |